The most common security breach with AWS S3 object storage is caused by misconfiguration.
If you do a quick Google search for “aws public bucket breach”, you’ll find, for example, exposed data of an estimated 500,000-600,000 people and “Data on 123 Million US Households Exposed Due to Misconfigured AWS S3 Bucket” that have happened in the last few years. Clearly we have a problem. Developers and businesses mistakenly create public AWS buckets to make it easier to access content, not realizing that anyone on the internet can also view the same data.
Using presigned URLs can keep data protected while also making it accessible to only those you share it with.
What is an AWS S3 presigned url?
For starters, S3 is an acronym for simple storage service that is hosted by Amazon Web Services (AWS) offering a reliable way to store your data. It allows storing files in buckets that are similar to folders on desktop computers and has an easy way to retrieve the data using its S3 API or browser web console.
A presigned URL allows sharing a file temporarily to users with the link or a group of users I specify. It also ensures the file is only available for a certain period of time and does not expose any of the other files in the bucket.
How do presigned URLs work?
Pre-signed urls work by creating a special key or token that is cryptographically unique. What that means is that it would take a really long time to guess what series of characters are in the token.
Have you ever shared a photo from Google photos and inspected the link?
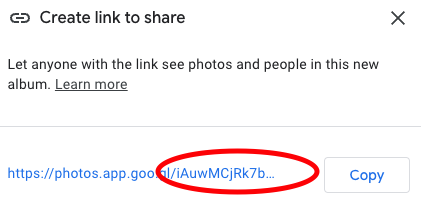
You’ll notice a series of seemingly random characters. Those are what make up the special key to the data. Anyone with the key is able to view it, and since it has plenty of random characters, it would be nearly impossible for someone to guess it.
In a similar way, presigned URLs include a token that grants specific individuals or services access to files.
Here’s what a presigned URL looks like:
https://gateway.storjshare.io/demo-bucket/my-file.txt?X-Amz-Algorithm=AWS4-HMAC-SHA256&X-Amz-Credential=jx6hia24r2va4aa4iwwinwzqofoa%2F20220728%2Fus-1%2Fs3%2Faws4_request&X-Amz-Date=20220728T214316Z&X-Amz-Expires=3600&X-Amz-SignedHeaders=host&X-Amz-Signature=ec5555fc80e48dfb0c97901c0d6ff66c35fce07457ab7b41592265878ea21698
Looking closer at the link you’ll see a “?” and then a number of things separated by “=” and “&”. Anything after the “?” are called url params. Each param is separated by an “&.” On the left side of the “=” is the name for the param and on the right is the value.
In the above pre-signed url we have the params “X-Amz-Algorithm”, “X-Amz-Credential”, “X-Amz-Date”, “X-Amz-Expires”, “X-Amz-SignedHeaders”, and “X-Amz-Signature”. Each param provides information to Amazon’s servers to know how to handle the link. The token (or secret key mentioned earlier) is sent with the “X-Amz-Credential” param.
All right, now that we’ve covered how they work, how can I use them?
How to set up Storj with aws-cli
First I’ll need to download and install the aws-cli.
For other platforms, see Installing or updating the latest version of the AWS CLI.
Next I want to use the aws-cli to create a pre-signed url with Storj. Storj provides an S3 compatible API which means it’ll mimic what AWS would do.
Here’s how to get started:
- Create an account on Storj DCS
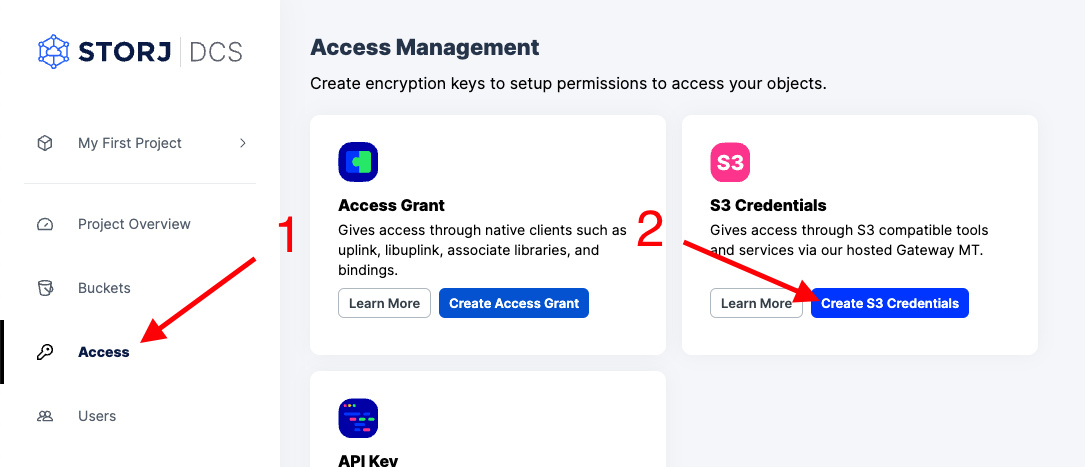
- Click “Access” on the left navigation
- Click “Create S3 Credentials” on the access management page
- Give the credentials a name, permissions, and generate a passphrase for your data.
In your terminal run:
Copy the “Access Key” to “AWS Access Key ID”
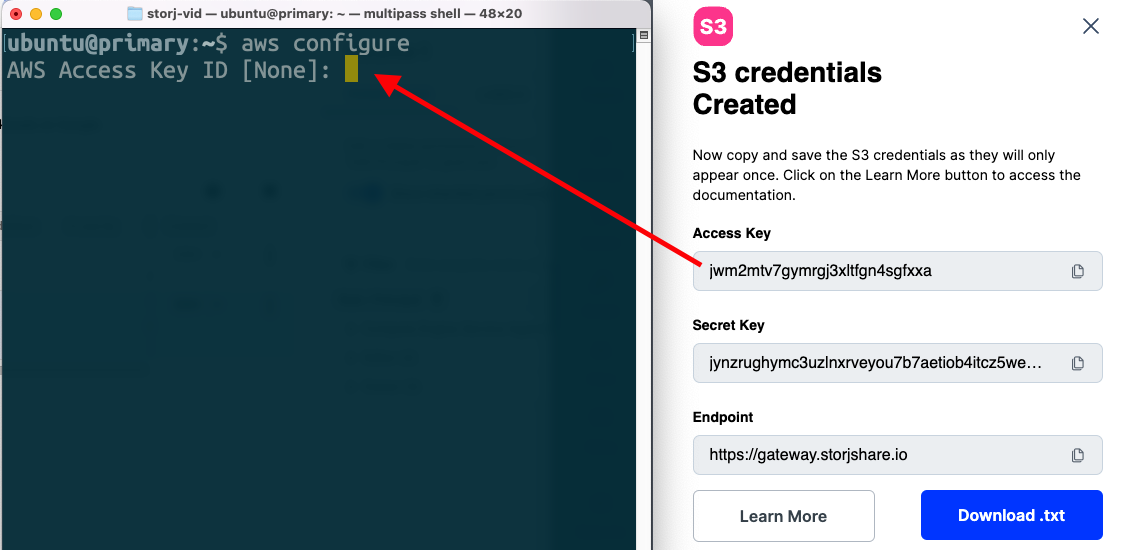
Copy the “Secret Key” to “AWS Secret Access Key”
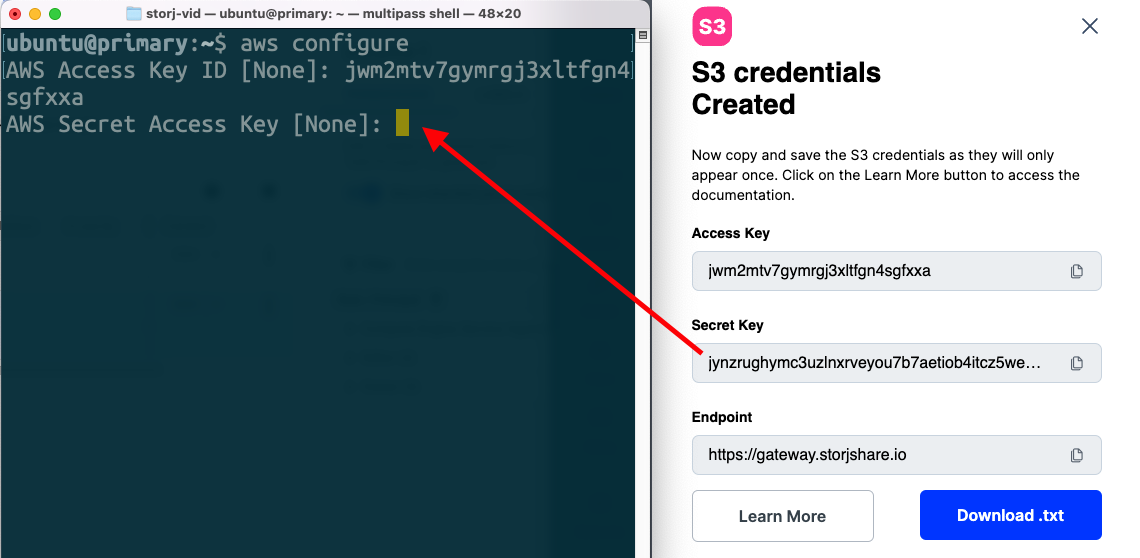
Finish the configuration by entering a region name and output format (default of “None” is okay).
Upload a file to share
Now that aws-cli is configured, we’ll want to create a bucket and upload a file.
To create a bucket, I’ll use the “aws mb” command which takes a path to file as an argument. Much like how I visit a website on the internet with “http://”, I can retrieve files on S3 with aws-cli using “s3://” Also notice that in order to use the Storj S3 gateway, I’ll need to pass the additional argument “--endpoint-url=https://gateway.storjshare.io”.
Create a bucket called “demo-bucket”
Create a file to upload
Use the “cp” command to upload the file to my bucket
How to create presigned urls
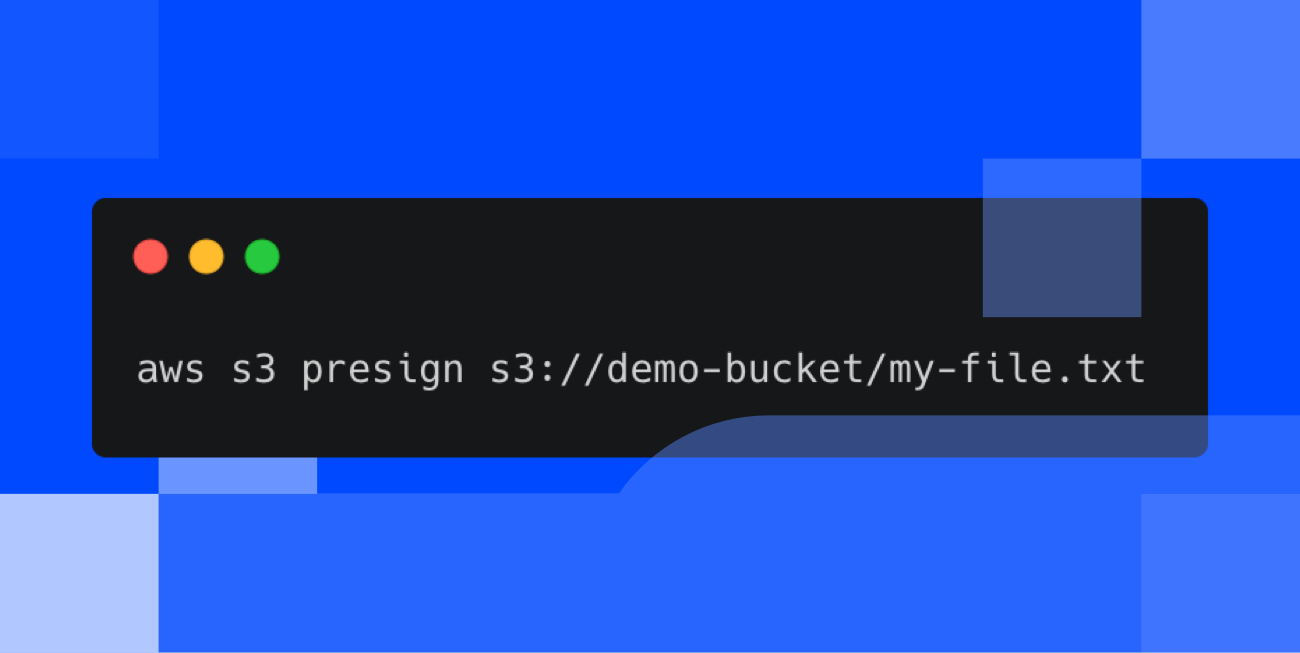
Once you have your aws-cli configured you can proceed to generate presigned URLs with “aws s3 presign” command.
Note that the "X-Amz-Expires" header is set to the default expire time of 3600 seconds or 1 hour. By the time you’re reading this, the link will likely be expired, proving that presigned URLs work as intended.
Changing the expire time
The `aws s3 presign` command also has an option to set a custom lifetime or a specific expire time using the `--expires-in`
The following presign command generates a pre-signed URL for a specified bucket and key that is valid for one week:
Presigned URLs are a great way to give limited access to the contents of a file. You can create them for a specific file or for all the files in a bucket. The person who receives the pre-signed URL can then access the files according to the permissions I specify.


